Warm-Up
P.O.T.D. (we will need this for our tutorial)
Part 1 - Change Your Hair Color
Time to go from ashy to class - yes, I said it!This tutorial involves the following:
- READING
- CAREFUL ATTENTION TO DETAIL
- HAVING 2 WINDOWS OPEN AT THE SAME TIME
If you think you can handle it, proceed. If not, well, let's proceed anyway.
Here's the original:
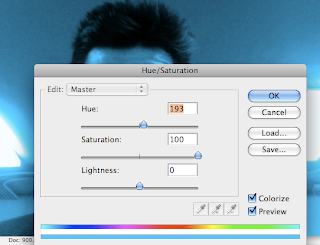
Here is my breakdown of the steps:
1. Choose a photo to work with, Lets use one with HAIR in it (no hats or hoods). Open it with Adobe Photoshop.
1. Choose a photo to work with, Lets use one with HAIR in it (no hats or hoods). Open it with Adobe Photoshop.
5. To do that, simply select white as your color and get out your paintbrush . Choose a medium sized brush with a soft edge (reduce opacity and flow to 50%). You may have to zoom in on some parts but you'll see how easy the color glides on. You don't have to be perfect here, just get it the best you can, it will be easy to touch up later.
6. Now all you have to do is set the blending mode to soft light. That's it! On lighter color hair I've found that setting the blending mode to hue works a little better, just try out a few and see what you like. If you ever want to adjust your layer mask, simply click on the mask itself (to the right of the layer picture in the layers palette) and use the color black to hide, and the color white to reveal.
The same method works for eyes and clothes.
7. Go to File > Save For Web and Devices and save your image to post on your blog.


No comments:
Post a Comment